Activation using passport scanning
Intended for customer support. This activation method only applies for customers of banks that have an agreement on activating the BankID app using passport scanning.
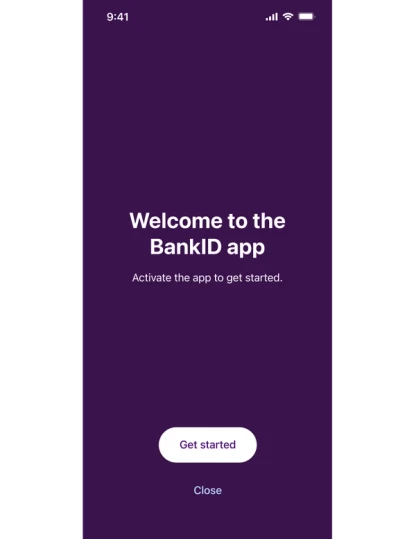
Step 1 - Home page
When you open the app for the first time, you'll see this screen. Select "Get Started" to activate. If you have opened the app before, you can choose "My BankID" at the bottom and then "activate app".
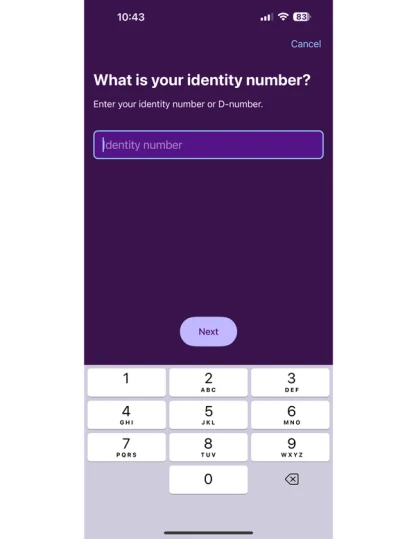
Step 2 - National Identity Number
Enter your Norwegian National Identity Number (11 digits).
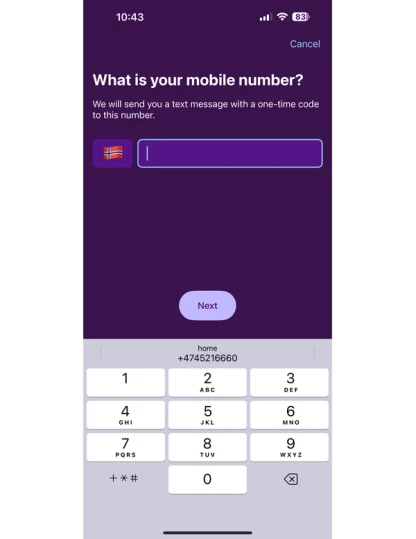
Step 3- Phone number
Enter your mobile phone number and press "next", The phone number needs to be the same as the number registered by your bank.
We use your phone number to send a confirmation code by SMS, that you will need to enter in the next step.
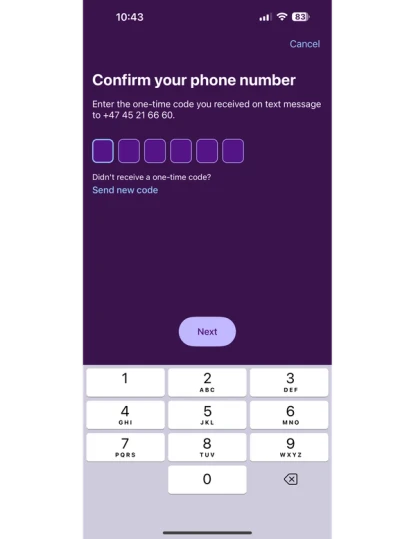
Step 4 - Confirm phone number
After entering your phone number, you will recieve a one-time confirmation code by SMS. Enter the six-digit code and press "next".
By entering the code, you confirm that is your phone that is being used to activate BankID.
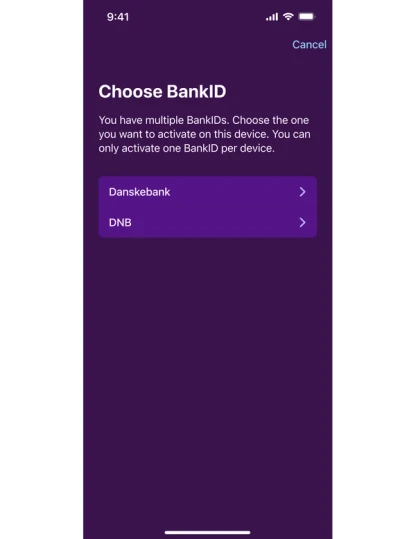
Step 5 - Choose BankID
This step only applies to user who have more than one BankID. In that case, the user need to choose which BankID to activate the app with.
Select a bank to continue.
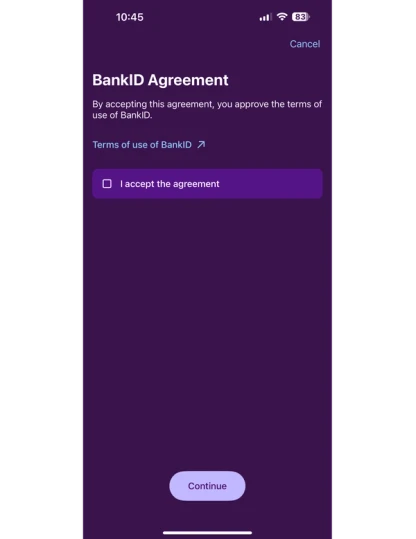
Step 6 - Accept BankID agreement
To continue, the user needs to accept the terms and conditions for the use of BankID in the agreement. The agreement is opened by clicking the link "Terms of use of BankID".
Check the checkbox to agree to the agreement and press "Continue"
Step 7 - Activation method
I this step you are presented with the option to activate the app via passport, or Norwegian national identity card, or alternative methods. Select "Passport or national ID card" if you are using passport scanning to activate.

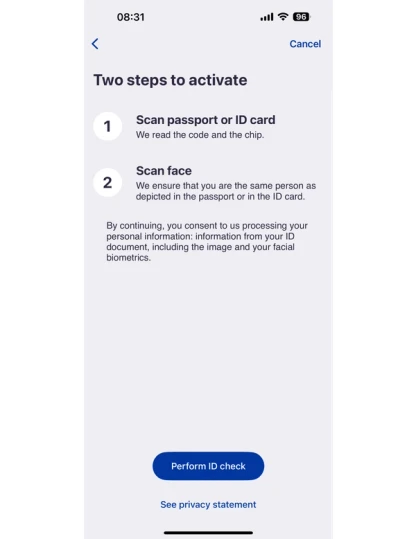
Step 8 - Steps in the activation process
Here you receive information about the steps you will be going through in the passport activation of the BankID app. Read the information and press "Perform ID check".
Step 9 - Camera access
If you have not enabled it before, the BankID app will ask permission to use your device's camera. We will need it to scan your passport and face later.
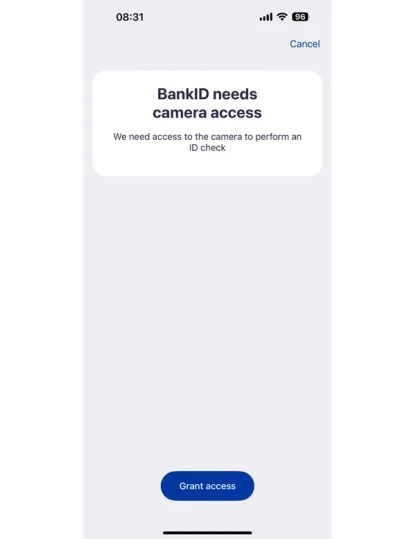
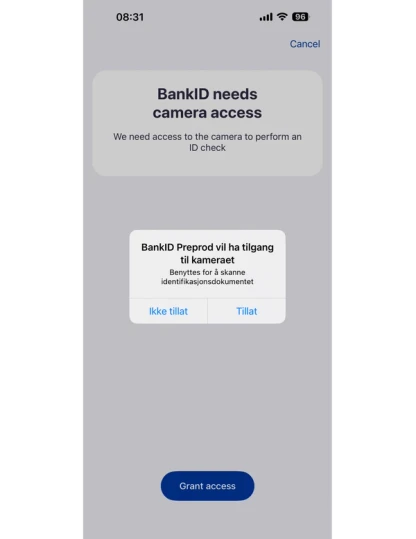
Step 10 - Grant camera access
Your phone's operating system will ask you to grant access. Select "grant access" to continue".
Be aware that this example is from an iPhone. If you have an Android device, this screen will look slightliy different.
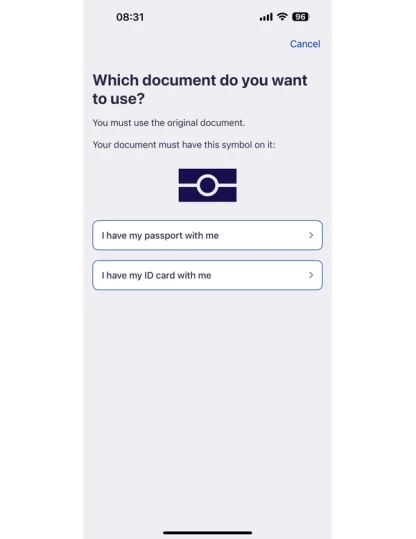
Step 11 - Choose document
Choose if you would like to use a passport or a national ID card to activate the app. Select "passport" to proceed.
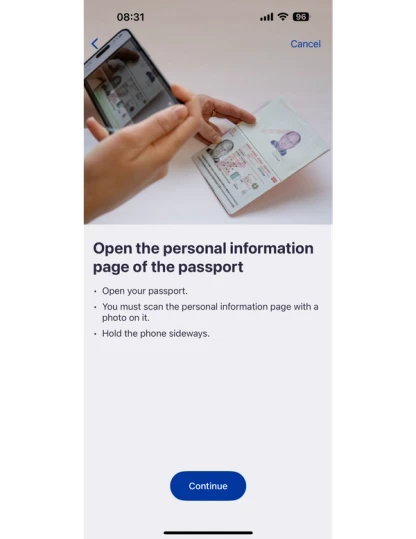
Step 12 - Information about passport scanning
This screen informs that you are going to scan the page in your passport containing your picture and personal data. Press "Continue" to proceed.
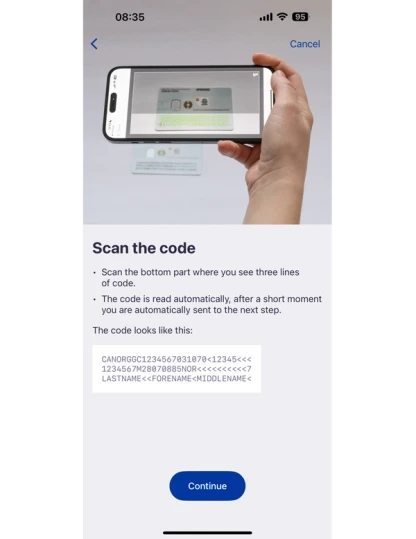
Step 13 - Scan the code on the bottom of the page
Here is more information about what you should scan on the personal information page of the passport. It's the code at the bottom of the page that you need to aim the camera at for the scanning to work.
Press "continue" to proceed.
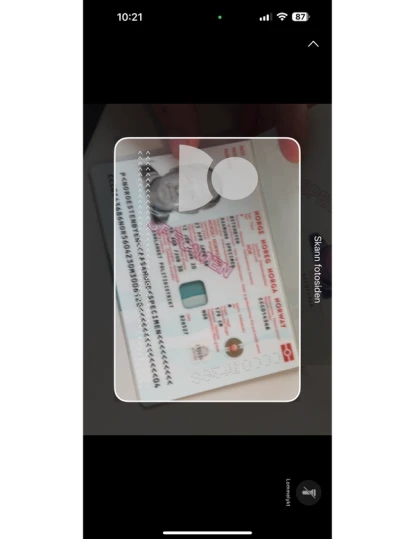
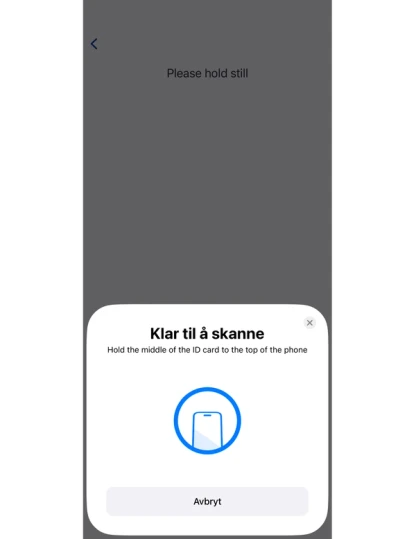
Step 14 - Scan the code in the passport
Now, the camera on your phone will scan the code in the passport. Make sure you have good lighting conditions, without too much glare from the passport, and aim the camera directly at the code at the bottom of the personal information page.
Hold your camera horizontally (sideways).
Activation will proceed automatically when the scan is completed.
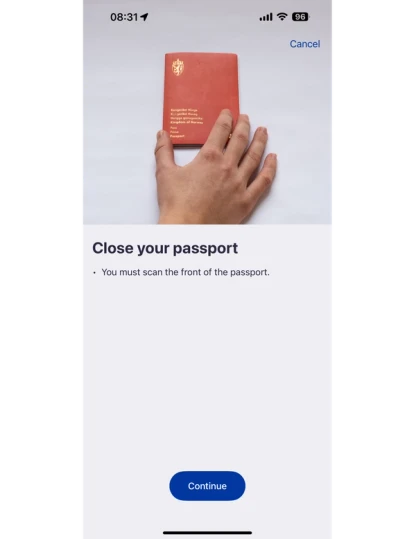
Step 15 - Close the passport
Once the scanning is competed, you will be asked to close the passport. The next step is to scan a chip inside the passport.
Step 16 - Scanning information
Here you will receive more information on how to proceed with scanning the chip in the passport. Read the information and press "Continue".
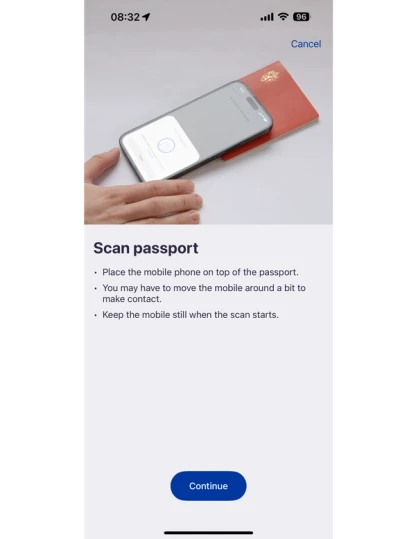
Step 17 - Scan the passport's chip
Place your phone on top of the passport and wait until the scanning is completed. You may need to move the phone around slightly to establish contact. The phone will begin scanning automatically once it makes contact.
Step 18 - Facial scanning
In this step, we will scan your face using the camera on your phone. This is to verify that you are the same person as in the passport. Read the information about the procedure and press "continue."
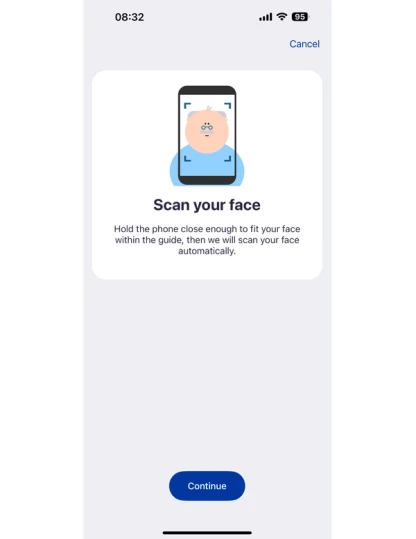
Step 19 - Facial scan
Point the front camera/"selfie camera" towards your face and follow the instructions.

Step 20 - Activating the app
When the scanning is completed, you will see this screen where the app is connecting your BankID. Wait until the connection is finished. The activation will continue automatically.

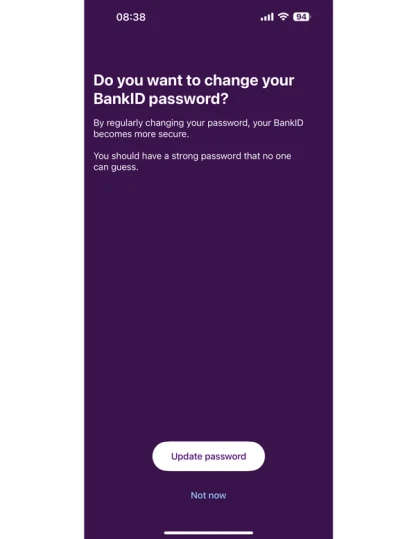
Step 21 - Change BankID password
In this step, you will be asked to change your BankID password. We reccommend that you change it regularly for security reasons.
If you wish to change your password, select "Update passord".
If you do not want to, select "Not now" and skip to step 24 in this guide.
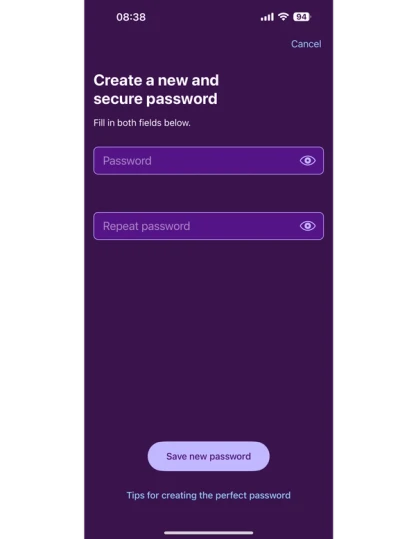
Step 22 - Enter new password
Here, you can enter your new BankID password. The app will guide you to a passwprd with enough characters.
You need to enter the password in both input fields. In order to check if the two passwords are identical, you can press the "eye"-icon to see what you have written.
When the new password is entered, you can select "Save new password" to continue.
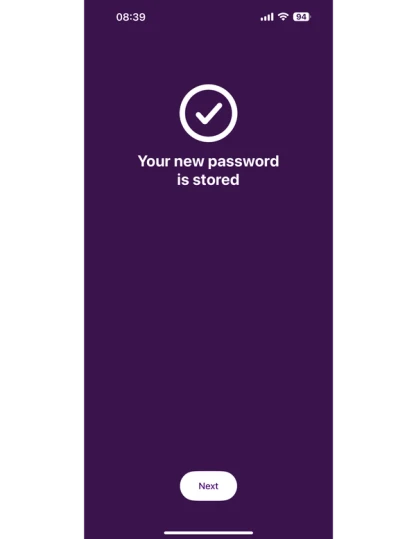
Step 23 - Password updated
You have successfully changed your BankID password. Select "next" to continue.
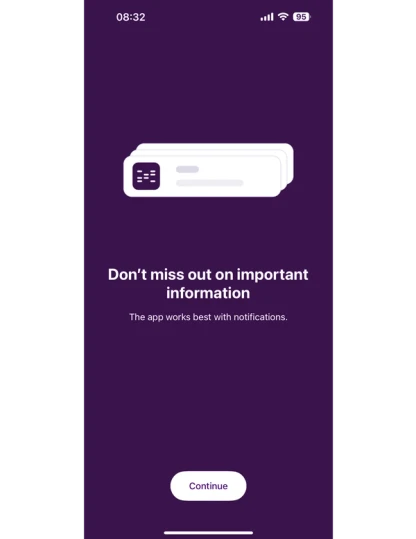
Step 24 - Notifications
We strongly recommend you to enable notifications from the BankID app, in rder for you to be notified about when to open the app when logging in or authenticating yourself.
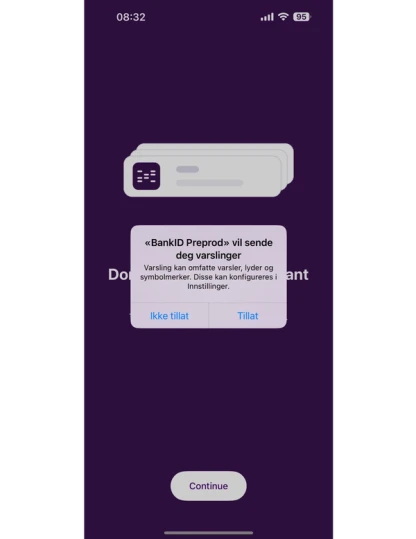
Step 25 - Enable notifications
In this step your device's operating system will ask if you want to allow the BankID app to send notifications. Press "allow" to enable.
This example is from an iPhone. If you have an Android device, this screen will look slightly different.
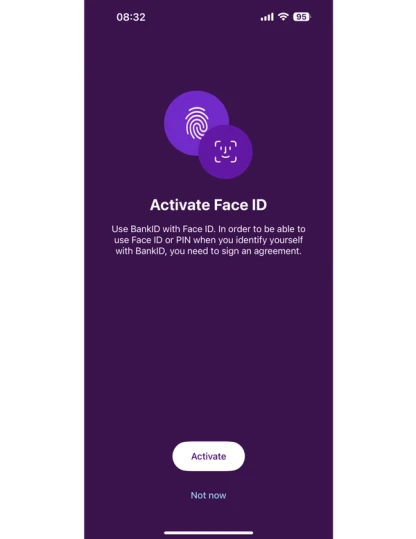
Step 26 - Enable biometrics
In this step you will be asked if you want to enable biometics. we recomment it, because it will allow you to log in without entering your BankID password in situations where biometrics is used.
Press "activate" to get started.
If you do not want to enable biometrics, or want to do t later, press "not now" and skip to step 34 in this guide.
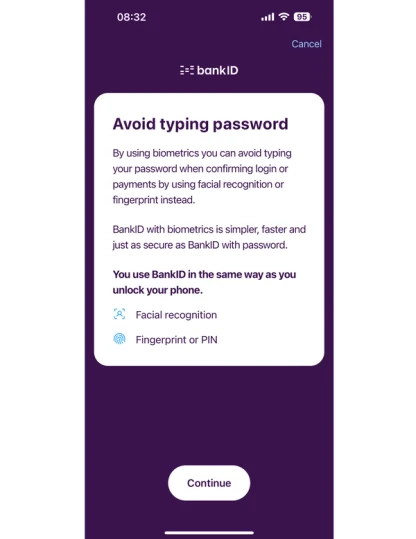
Step 27 - Information about biometrics
Read the information about how BankID biometrics work, and press "continue".
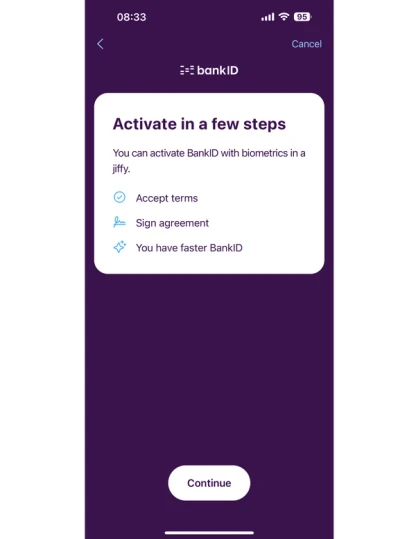
Step 28 - Activate in a few steps
Read the infomration about the activation process and select "Continue".
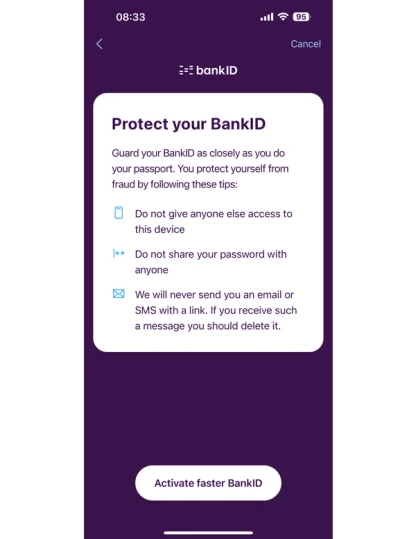
Step 29 - Security information
Read the information about how to protect your BankID carefully. Make sure that no one else has access to unlocking your device with biometrics,
Press "Activate faster BankID" to continue.
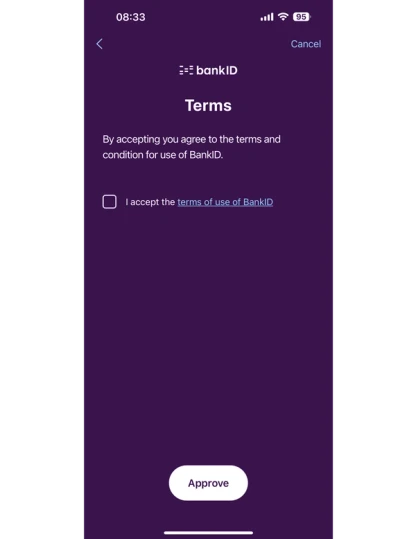
Step 30 - Accept terms
In order to enable BankID biometrics, you need to accept the terms of the service.
You can read the terms by pressing the link next to the checkbox.
When you have read the terms, click the checkbox and press the "approve" button.
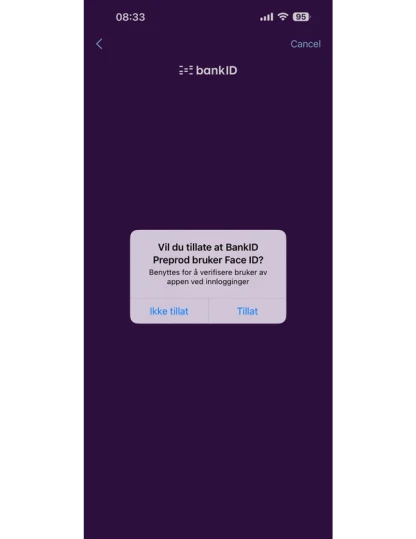
Step 31 - Allow the BankID app to use biometrics
In this step, your device will ask you to allow the BankID app to use the device's biometrics. Press "allow" to continue. This is required for BankID biometrics to work.
This example is from an iPhone. If you have an Android device, this screen will look slightly different.
After you have pressed "allow" your phone will do a biometric scan similar to when you unlock your device.
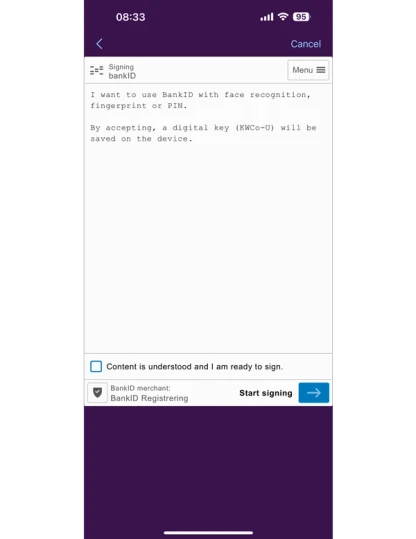
Step 32 - Sign agreement
You need to sign a shport agreement of use in order to activate.
Click the checkbox at the bottom of the white field and press the blue arrow to start signing.
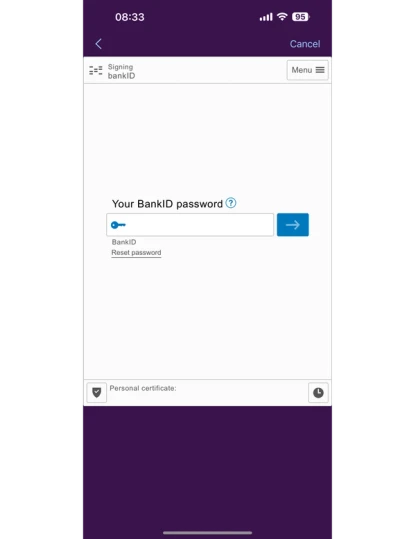
Step 33 - Enter BankID password
Enter your BankID password to sign the agreement. Press the blue arrow to continue.
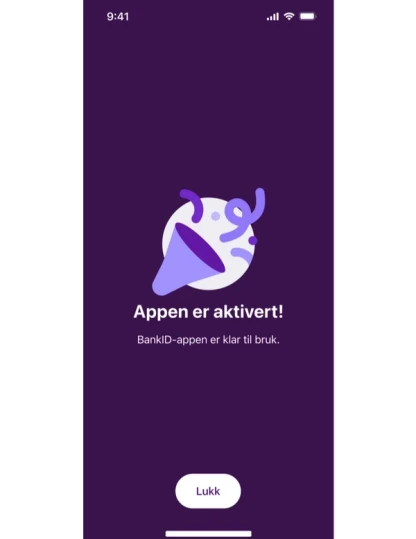
Step 34 - Activation complete!
The BankID app is active and ready for use.